Chicken Kabobs

Here in Florida, even though it isn't unbearably hot yet, cooking indoors right now increases the temperature of our apartment so much that it's uncomfortable. This is why we love our grill. Tonight we fired it up to cook grilled chicken and vegetable kabobs. To compliment the chicken we used a colorful mix of vegetables: beets, white onion, green pepper and pineapple.


Ingredients:
1/2 green pepper
1/2 white onion
2 medium beets, steamed until tender, skin removed
2 c pineapple
1 chicken breast
olive oil
salt and pepper
seasonings or rub - we used a chili lime rub we had on hand

Turn the grill on to heat. Cut the chicken into 1" size pieces and season with the oil, salt, pepper and seasonings. Toss to coat and set aside. Cut the veggies into similar size cubes (to even cooking time). Place the chicken on skewers.


We put the chicken on first, for a total of about 8 minutes, turning once (but your cooking time would depend on the heat of your grill). While the chicken is cooking, make the vegetable skewers. Once we took off the chicken, we put the veggie skewers on the grill. I let those grill for about 5 minutes on one side to get a nice char, and then flipped to get light marks on the other side.


Remove the skewers from the grill and slide the chicken and veggies off the skewers and onto a serving plate. Toss the chicken and veggies together and serve.

Kitchen Gear - The IngenuiTEA Pot

Nick and I drink some hot beverage (at least) once a day. On the weekends we'll drink coffee since it takes longer to prepare, but during the week we drink tea. Tea making is usually my responsibility since I am often the first one up. I make two cups, one for him and one for me. I take mine to work and leave his on the counter for when he wakes up. I had been using our french press to make the brew, but cleaning it was a pain and whoever got the tea at the bottom of the press got all the good (read: caffeinated) bits. It worked well, but we were on the lookout for something better. Then, wandering through some shops in Winter Park, we spotted IngenuiTEA at one of the local tea stores.


This is the coolest thing on the planet. Okay, maybe not, but it's still pretty neat. You put in the loose tea, add water, and then brew. When it's done, you lift the pot from it's base, place it on a mug and:


 It filters the tea from the bottom straight into your mug. It's also easy to clean, has replacement filters available and is dishwasher and microwave safe. We have the 32 oz so we can get two full mugs in the morning, but they also have a smaller, personal version great for the workplace.  

Any tea drinkers out there?

Mushroom Lasagna

Who doesn't love lasagna? Creamy layers sandwiched between layers of pasta? This twist on the traditional lasagna (original recipe from Food & Wine) was not only delicious, it was meat-free. Nick adores meat, and so making a meat free meal is pretty rare. This lasagna, though, is a keeper. We'll definitely be making this one again!


Ingredients:

2.5 tbsp butter
1/8 c flour
1 1/2 c. heated milk or cream
3 cloves garlic, 2 finely chopped, 1smashed
pinch of nutmeg
6 lasagna noodles (we used no-boil to save a step)
1 large onions, diced
2 lb whole portobello mushrooms, sliced
1 bunch basil, diced
1/2 c. heavy cream
1/2 c. Pecorino Romano, grated
salt and pepper

Melt 1.5 tbsp butter in a pan over medium-low heat. Whisk in the flour and incorporate into the butter, creating a rue. Add the cream to the rue and stir so that there are no lumps and the milk/cream is thoroughly incorporated into the mixture. Throw in the crushed garlic clove and nutmeg and simmer, stirring. Once it has thickened, turn off the heat and set aside. Salt and pepper to taste. In another pan (I recommend one that's deep), saute the onions and garlic in the remaining butter. Once the onions are clear, about 5 minutes, add the mushrooms and saute until tender. In a food processor, mix the cream and basil. Mix half of the cream mixture into the mushroom and onions and set aside the other half.


In a greased 9" x 9" baking dish, layer the bottom with the cream garlic sauce. Add a layer of lasagna noodles and top with the mushroom mixture. Add another layer of noodles and mushrooms and continue until the mushrooms are used up (I think we had 2 layers). Place noodles on top of the last mushroom layer. Mix the remaining cream garlic sauce with the basil cream and half the pecorino. Pour on top of the noodles. Top with the remaining cheese and bake in a 450 F oven for 45 minutes. Let rest before serving for 10 minutes.

Goat Cheese Ravioli

Remember these? Well, they were my first ravioli since my dairy allergy and I decided that I needed to eat more because they were so delicious. Since typical cheeses for ravioli, like ricotta, are no-go's for me, I thought to make them with goat's cheese, chevre to be specific.

Also, in our first go-around with the wonton wrapper raviolis, we were less than thrilled. They are fast, and easy, but flavor and texture wise they just weren't cutting it. Plus, they were a little hard to seal. So, this time around it looked like we were going to be making pasta.

So, I made some pasta dough. It was an interesting experiment, since well, we don't have a pasta roller, or a rolling pin for that matter. If you are interested in the pasta recipe, check it out at Serious Eats. It was a very tasty pasta, but I think next time we'll try the recipe in The Silver Spoon, since it seems simpler and uses less ingredients. Less fuss = better in my book.  I'll do a post on that when we try it.


Ingredients (for ravioli):
1/3 lb chevre, I used plain so that I could add flavors myself
2 bunches of spinach leaves, steamed
1/4 c pecorino romano, grated
salt and pepper
pinch of nutmeg
pasta dough


Mix all of the ingredients together in a bowl and refrigerate for easier spooning and shaping when filling the raviolis.

I rolled the pasta dough very thin (with a water glass). I placed 1 tsp of the filling on the pasta every two to three inches. I used an egg wash to seal the edges once I folded the dough over the filling (don't forget to squeeze out any air bubbles), but if your dough is moist enough and sticking together easily, it's a step you can probably skip.


Since I don't have a biscuit cutter or anything, I cut the rounds out with a measuring cup (1/3 c. worked out pretty well). Since I made them earlier than we were planning to eat them, I froze them on a cookie sheet until solid and then placed in freezer bags so they wouldn't stick together.


When we were ready, I simply took them out of the freezer and placed them into salted boiling water. Once they floated, I pulled them out, drained and tossed them with the sauce and served.


Ingredients (for sauce):
3 tbsp butter
2 shallots, diced
3 tbsp all purpose flour
1/2 c chicken stock
2 tbsp heavy cream
salt and pepper

To make the sauce, melt the butter over medium low heat, add the shallot and saute until tender. Add the flour and mix into the butter forming a light rue. Add the chicken stock slowly, and stir often to avoid lumps. Add the cream, salt and pepper and cook for a few more minutes, without boiling so the rue doesn't separate. (If it does, however, a quick blend with an immersion blender should bring it back together).


We served them with a side of roasted asparagus and some fresh and crusty french bread.

Cannelli Bean & Basil Dip


We had a great dip at a restaurant back in Pittsburgh, Lidia's, and thought it was a great twist on the typical, but also tasty pesto dipping sauce. It was a basil dip, made with cannellini beans, so we attempted to recreate it at home, and I think we've come close.

Ingredients:
1/2 c of cannellini beans, dried
3 tbsp pesto sauce
1/4 c olive oil
salt and pepper


First, soak the cannellini beans in a bowl of water for a day. Then boil until soft, about 1 hour.


Once the beans are tender, drain and then place into a blender or food processor. Add the pesto sauce and enough olive oil to make it creamy. It works pretty well if you add a little of the oil at a time so you can gauge the creaminess as you go. Salt and pepper to taste and serve alongside warm, tasty bread for a great appetizer.

Nick's Homemade Meatballs

A simple, go-to meal of ours is some form of pasta, usually spaghetti and meatballs. Nick's family is Italian, so many of his comfort food recipes are based in that type of cuisine.


Sometimes we make our own sauce. We did last year when I had received a ton of tomatoes from the CSA I was in. We froze it in portions and I had homemade sauce for quite some time. Right now, though, tomatoes just aren't ready for sauce making. We always make our own meatballs, though.

Ingredients:
1/2 lb pork
1 lb ground sirloin
1 pieces of bread, soaked with water and sqeezed
1/2 c. bread crumbs
1 tbsp dried oregano
1 tbsp garlic powder
1 tsp dried basil
salt
pepper


Mix the meats, spices, and bread together. Add bread crumbs as necessary to thicken the mixture.


Roll them into a decent size ball. Ours were about an inch and a half in diameter. Fry in a skillet, rotating until brown on all sides. Add sauce to the skillet once the meatballs are browned and bring to a simmer. Thin out the sauce with water so it can thicken back up during cooking. This will finish cooking the meatballs. Toss in some cooked pasta for a quick and easy dinner.

What are some of your go-to comfort foods?

Miso Soup

I love going to sushi restaurants for the sushi of course, but also for the soup and salad. To spare Nick's wallet, last night we made miso soup and ginger salad. It's a light dinner perfect for a weeknight.


Ingredients (for the miso soup):

1 bunch scallions/green onions, chopped with green and white parts separated
1" piece of ginger, grated
3 garlic cloves, crushed and minced
4 pieces kombu
2 tbsp. sesame oil
8 c. water
8 oz. shitake mushrooms, sliced or 3 oz dried (we used fresh this time)
1/2 c. miso paste
14 oz. firm tofu
touch of chile oil


Saute the scallions (white parts), ginger, and garlic cloves with the sesame oil in the bottom of a sauce pan until fragrant, about 1 minute. Add the water and kombu and simmer for 10 minutes. Remove the kombu (it's pretty tough and just to add flavor) then add the mushrooms and miso and continue to heat for another 10 minutes. Don't forget to give it a stir after adding the miso to help dissolve it. It will land at the bottom of the pot and sit there otherwise. Add the tofu at the last minute and heat until just heated through, about 5 minutes, and stir in a touch of chile oil for a hint of heat. Garnish with some of the green scallions and serve. This recipe makes 4-6 servings.


I like to serve this soup with a salad of crisp, cool vegetables tossed with a ginger dressing.


Ingredients (for the dressing):

1/2 c chopped onion
1/2 c oil
4 tbsp rice wine vinegar
4 tbsp water
2 tbsp ginger root, grated
2 tbsp celery, chopped
2 tbsp soy sauce
3 tsp. tomato paste
3 tsp. sugar
2 tsp. lemon juice
1/4 tsp salt and pepper

Place all ingredients into a food processor and blend until smooth. And yes, even though it's going in the food processor, I still like to grate the ginger just to make sure it gets mixed up and there aren't any chunks left in the dressing. It won't be as smooth as a vinaigrette, so a little bit chunky is okay and to be expected. I love to use really crunchy ingredients in this salad, like romaine lettuce and cucumbers. I think the cool, crispness of the veggies compliments the warm spice of the dressing.

What are your favorite homemade "take-out" meals?

Rhubarb Squares with Orange-Rhubarb Compote

Since I had leftover rhubarb from the pie I had made, I decided to try Nick's Grandmother's Rhubarb Square recipe to use up the remainder. The original recipe for this was just for the squares, but trying them myself, they were a little too sweet for my taste. The bites heavy on rhubarb were tasty, the tartness of the rhubarb complimenting the sweetness of the crust and custard. But since there was, in my opinion, too little rhubarb in the squares, I decided to make a rhubarb and orange compote to add to the top.


Ingredients (for the base):
1 1/4 c. flour
1/4 c. sugar
1 tsp salt
1 egg yolk
1/2 c. butter, melted
1/2 tsp vanilla
1 c. rhubarb, cut into 1/2 pieces
1 1/2 tsp. quick tapioca

Ingredients (for the custard):
2 eggs
1 egg white
1 1/4 c. sugar
1/8 tsp salt
1/2 c milk or cream


To begin, mix the flour, sugar and salt. Then mix in the egg yolk, melted butter and vanilla. It's sort of a crumby dough, similar to cookie dough. Press the mixture into the bottom of a 9" x 13" pan.


Sprinkle the rhubarb evenly over the bottom layer and then sprinkle with tapioca.

To make the custard, beat the 2 eggs and egg white in a mixing bowl until it is thick. Gradually add the sugar and salt. Then, slowly add the milk or cream and mix well. Pour this mixture over the rhubarb and tapioca.


Bake the entire mixture for 45-55 minutes until the custard is set and rhubarb is tender. Once cool, cut into squares.


Ingredients (compote):
1/2 c orange juice
1 c. rhubarb, chopped into 1/4" thick pieces
a pinch of sugar

Bring the orange juice to a simmer in a pan over medium to medium high heat. Add in the rhubarb and sugar and cook until the liquids reduce, the rhubarb is tender (don't worry if it breaks up), and the sauce has the consistency of a thin syrup. I did keep mine pretty tart, not adding much additional sugar since I wanted it to offset the sweetness of the square. Allow to cool before drizzling over the rhubarb square.

Coconut Mango Chicken

After we made the coconut mango rice with the snapper a couple weeks ago, I really wanted to make something else with coconut. After scouring our cookbooks and magazines, I decided to try this recipe (found in Rachel Ray magazine) for coconut mango chicken. We served with a side of black beans we had already made previously. This is definitely a keeper for us, it was pretty effortless to make, quick to pull together and tasted wonderful.


Ingredients:
1 tbsp olive oil
1 boneless chicken breasts, cut into strips
1 tsp ground coriander
1/4 c. chicken stock
1/2 c. coconut milk
1/2 mango, peeled and cut into 1/2" pieces
salt and pepper
mint, chopped fine to garnish

Start by heating the oil in a large skillet. Add the chicken strips and cook, turning once, to brown all sides. Add the coriander to the pan and stir for about 30 seconds. Then add in the chicken broth, lower the heat and simmer for 3 minutes. Scrape any brown bits from the bottom of the pan and transfer the chicken to a plate. Pour the coconut milk into the pan and increase the heat to bring the milk mixture up to a boil. Reduce the volume by half. Once the milk is reduced, stir in the mango and heat until warm. Add the chicken and toss to coat. Season with salt and pepper to taste and garnish with mint. This recipe serves 2.

Springtime Risotto

This creamy springtime risotto is a light, tasty side dish. I like it with the sweetness and crunchy texture of the red peppers, but it would work equally well with other veggies, like peas and asparagus. We served it with grilled steak and asparagus.
 

Ingredients:

drizzle of olive oil
a pat of butter
1 onion, finely chopped
2 garlic cloves, minced
1 1/2 c arborio (risotto) rice
2/3 c of white wine 
6 c. chicken broth or stock
1 red pepper, diced
1/2 c. pecorino romano, grated
salt and pepper

Melt the butter and olive oil together in a saucepan. When hot, add in the onions and cook until transparent, about 5 minutes. Add in the garlic and saute until fragrant, about 30 seconds. Then, add in the rice and toast until transparent. De-glaze the pan with the wine and once the alcohol has cooked off, add chicken stock in batches of one cup, stirring regularly. Once the first cup of liquid is absorbed, add in another cup and continue this until all the stock is absorbed by the rice and the rice has a creamy texture. When you have about 1-2 cups remaining of the liquid, toss in the red peppers. Season with salt and pepper to taste. After the rice is tender and creamy, grate in some pecorino romano cheese. This recipe makes about 6 servings - and makes great leftovers. Enjoy!

Pancakes

Everybody has their own favorite recipe for pancakes. We have tried so many pancake recipes I can't even begin to count them. Some were too cake like, too sweet and fluffy. Some just were bland. Once we found this recipe, it has been attached to the fridge for easy Saturday morning reference. Just in case the magnet should fall and the recipe get lost, here it is, preserved on the blogosphere for easy reference.


Ingredients:

1 1/4 c. flour
3 tbsp sugar
2 tsp baking powder
1/4 tsp salt
1 c. milk
2 large eggs
3 tbsp butter, melted

Mix the dry ingredients (flour, sugar, baking powder, and salt) in a large bowl, I prefer glass so I can easily see if there are any unmixed parts hiding near the bottom.

Mix the wet ingredients (eggs, milk and butter) in a seperate bowl. Pour the wet into the dry and mix with a whisk. Make sure to mix enough to not leave any flour pockets or lumps, but don't over beat.


Heat a skillet over medium heat. Once up to temperature, pour in the mixture in small batches. A ladle works best. Also, now is the time to add your favorite fruits, nuts or my personal preference, chocolate chips. Wait until bubbles form on the surface and stay open once popped, then flip.


Once both sides are golden brown, remove from skillet and serve. This recipe makes nine  4" round pancakes.

Tangy Asparagus with Lemon & Mustard

My dad doesn't eat "A" vegetables. A vegetables include artichokes, asparagus and avocados (although you can't keep him from a bowl of homemade guac). They are,  however,  some of my favorite eats.


Anyway, this weekend at the market, we found bunches of asparagus for $1.50 or two bunches for $2.00. Deal? Yes! So, of course, we picked up two*. To keep it from getting monotonous, I looked into some other ways of preparing it besides the normal oil, salt, pepper, roast. I love roasted asparagus, but three times a week and I'm looking for something else to try.

I came across this recipe a month or so ago, and thought I would give it a try this week. It was only one step further than the oil, salt, pepper, roast method. But that last step kicked it way up.

Ingredients:

3/4 pound fresh asparagus
2 tablespoons extra-virgin olive oil
salt and pepper
1/2 tsp dijon mustard
1/2 lemon, juiced
1 tbsp olive oil
salt and pepper


So, to start, break or cut the woody stems off the asparagus.Line a baking sheet with the stalks and drizzle olive oil. Sprinkle generously with salt and pepper. I usually then toss them together to make sure that I coat all sides. Roast in the oven at 400 F for about 10 minutes or until tender. We tend to keep ours a bit firm.

While the asparagus is in the oven, mix up the vinaigrette. Mix the lemon juice and mustard and then slowly drizzle in the olive oil, mixing while you pour. Season with salt and pepper. I found our lemon to be extra juicy, so I added a bit more olive oil than called for because it was a little too acidic for my taste.
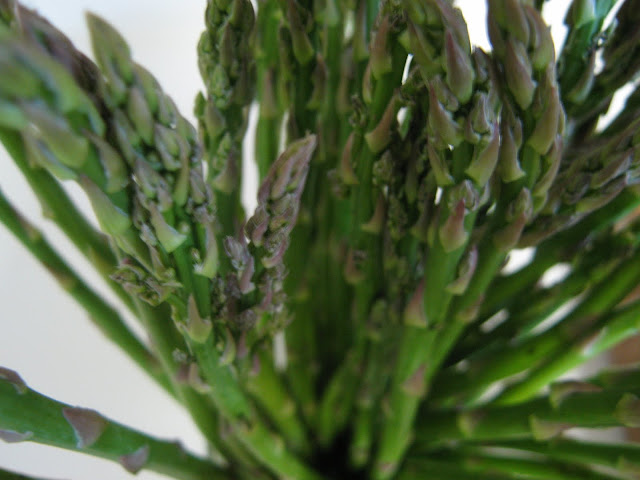

Once the asparagus is done, transfer to a serving dish or plate and drizzle the vinaigrette over the stalks. If you are used to asparagus roasted or steamed, the first bite will shock you. The tang of the mustard and the lemon was a nice compliment with the woodsy, smokey flavor of the asparagus, it just was more flavor than I expected, so my taste buds were not prepared. It's a good change, though, and a tasty combination. I hope you try it while asparagus is still inexpensive and in season.

* To keep asparagus fresher longer, we put the stalks in a juice glass and fill 3/4 up with water. It also makes a bouquet of green deliciousness in the fridge, so it's much more fun than a plastic bag or Styrofoam container.

Kitchen Lifesaver - Ready-Made Salads

On weeknights, we sometimes have problems getting dinner on the table at a decent time. Sometimes one or both of us work later than usual and we found ourselves eating at 8:30 or even 9. Because of that, on nights that we are home early and have some time, we make salads ahead of time. It works for us because we often eat salads with dinner and having the first course ready helps us get the main part of the meal done faster.


It's pretty straight forward. We chop up all the lettuce with a lettuce knife (no metal knives hear kids - it turns the salad ends brown) and wash and dry it using a salad spinner. Then we place it in a container with paper towels on the top and bottom. We can use this up to a week usually without it going bad. This alone saves us a ton of time.

Also, if we have salad one night, and know we are going to be eating salad the next night, we'll portion out bowls for the second night as well. Making four salads really takes no more time than two, but to bring out all the veggies again and chop the small portion up the second time can really be time consuming. So, we take 4 bowls, fill them with the pre-washed, pre-chopped lettuce and then add the toppings that will keep well overnight, like cucumbers, olives, mushrooms, and peppers to all four salads. Then, we place plastic wrap over two of them and place them in the fridge.


We'll then top the two salads for that night with the things that don't keep as well, like avocados and feta. We add these things to the day two salad on the night we eat them, since they don't keep well. It's a great time saver, and while I would prefer a freshly prepared salad, I like doing this because it allows us to have salads on days when we wouldn't have time to prepare one. What are some time saving tricks that you do to make your meals come together easier/faster?

Standing Rib Roast Burritos

My love affair with items wrapped in tortillas goes way back. During the Girl Scouts when I was about 10, I brought quesadillas to the "Bring your Favorite Food" meeting. Needless to say, my mother's homemade dessert quesadillas, made with Monterrey Jack cheese and brown sugar wrapped inside of fried, then baked corn tortillas, was not a hit by the chicken nugget and brownie crowd.


 So, it's no surprise that I love burritos. We eat them a lot to use up the little bits of veggies we collect with other meals or meat we have left over from some other meal. Tonight's burrito was a mix of veggies that we needed to use up, an avocado getting too ripe, a half used orange pepper from this recipe, some left over cilantro, an onion, and watercress from this dinner. Add a tomato and some cheese (Drunken Goat's Cheese - which adds a creaminess with the perfect amount of tang). Pull some black beans from the freezer and heat up the remainder of a rib roast from the weekend, sliced very thin and you've got the makings of a great dinner.


I wrapped up two more for our lunches tomorrow (without the leafy stuff and avocados - packed separately). I am so excited to eat the rest up tomorrow. Yum!

Avocado Pizza

We eat pizza about once a week. This week, we decided to switch it up and use a recipe that's perfect for springtime. It's based on a Rachel Ray Magazine recipe. Instead of heavy, tomato based sauce and cheese, it uses avocados and leafy toppings.


Ingredients:

1 pizza dough
1 cup grape tomatoes, sliced in quarters
1 shallot, thinly sliced
olive oil
1 tbsp balsamic vinegar
2 avocados
1/2 package of bacon, cooked and crumbled
1 bunch watercress, or other peppery, leafy green - remove large stems


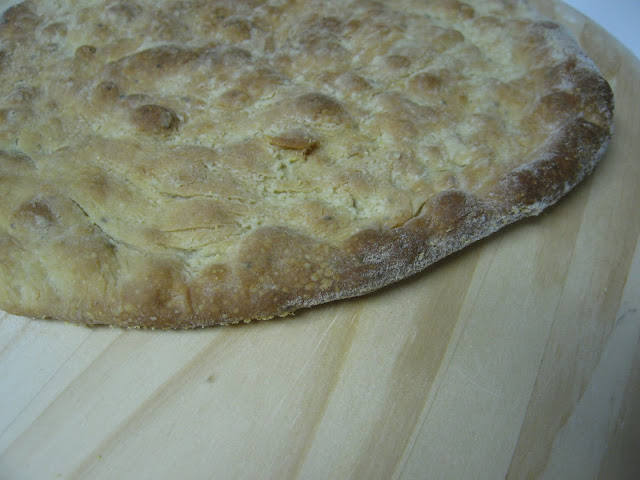
Stretch out the pizza dough. Brush with olive oil and bake.We used the dough from our freezer, but store bought would work. We baked until crispy in a 450 degree oven, about 20-25 minutes.


Whisk together the olive oil and vinegar. Toss the tomatoes and shallot in the mixture. Season with salt and pepper. Set aside.


Mash the avocado and spread onto the cooked pizza crust (let it cool a bit first). Top the avocado mash with the watercress and the tomato and shallot mixture. Top with the crumbled bacon. Drizzle with some of the remaining vinegar/oil mixture.


Cut, serve and enjoy!

I thought the avocado topping was delish, but then again, they are possibly my favorite food. Nick really enjoyed it as well. We got our avocado's this week for 80 cents each, so all in all, this pizza cost us around 5 bucks, maybe 6. Serves 8 slices. Definitely a keeper.

Spring Onion Green Potatoes - Two Ways

Now that I'm back to being myself (post licensing exam - part I), I am feeling like I have more time. Today, we went to the Daytona Beach Farmer's Market. It's a weird place, but to get great deals on local veggies and fruits, it's well worth the trip. The awesome kettle corn doesn't hurt either. We needed to get some onions for a the week and they had a bounty of spring onions. I picked one up and brought it home.


I was putting away our food and chopped off the green part, since it was cumbersome in the veggie drawer. Not yet sure that these greens were garbage, I saved them figuring I could figure out something to do with them. After a little research, we decided to use them in some leftover mashed potatoes. Always up for an experiment, we decided to try it two ways.


The first batch we prepared like onions or leek, wilting and caramelizing the greens and then adding them to the potatoes:


The second batch received chopped raw onion greens tossed into the potatoes as is - sort of like chives:


And the winner is:


It's a tie! Nick liked the wilted onion better because it tasted richer, sort of like a pierogi. It did have a more buttery flavor, probably from the oil used to saute the greens. I preferred the raw greens. I felt it gave a more crisp, onion-y flavor and didn't taste as heavy and rich as the wilted greens.