Showing posts with label easy. Show all posts

Club Baked: Nutella Scones


My mom has always tried to instill healthy eating habits in me. We had rules in our house. One sweet thing a day, no cereal with more than 11g of sugar per serving. I was the only kid who read nutrition labels in the second grade. Grocery shopping included a lot of veggies and fresh foods. I got excited when I was able to pick out a new fruit to try because I knew I wouldn't get away with sneaking Bubbalicious into the cart. Eyes in the back of her head, she said. She cooked our meals, which I never thought was abnormal until I went away to school.

Fast forward to college: Shopping with my roommate senior year, she mentioned that she wanted meatballs. So, I steered our cart towards the meat section. She looked at me like I was crazy and asked, "Where are you going?" I told her to the meat section, so she could get meat for meatballs. She then introduced me to the frozen foods section, two whole aisles of food that is already made. And then pointed out the meatballs. In a bag. Ready to be eaten. (Did you also know they made french toast like that? Sheesh, the education I got that day.)

So, I immediately text my mother (who I think might still have this text message): "You did not prepare me properly for the world. Did you know that they have meatballs already made in the freezer section? They make lots of things already made. How could you not tell me this?" I'm paraphrasing, of course, but that was the gist of it.

Her response of course, was that I could make my own meatballs, freeze them individually on parchment paper and then bag them up to have my own ready made meatballs in the freezer. Totally missing the point that you could buy them that way.

Anyways, that whole meatball intro was to help you understand my culinary background and it's lack of processed foods. And the fact that I've never in my life had Nutella. 


Deprived. I know.


Anyhow, now that I am all old and grown, I have this pesky milk allergy and I can't have Nutella. (Thanks Mom, seriously, all those years that I missed out.) So, for the Club Baked Nutella Scones recipe, I made the "Hazelnut Spread" recipe that was found in the cookbook. And my loving husband said that it does not taste like Nutella. Great...


Despite that fact, I continued on and made the scones. I actually love scones. They are easy to put together, quick to make, and can have almost any flavor, sweet or savory. These are no exception in ease of preparation and the flavor is nice. A chocolate scone with a layer of Nutella (or, in my case, hazelnut spread) running through, topped with another drizzle of Nutella and crushed, toasted hazelnuts.


My only complaint: These are dry. I get that scones are dry. But I guess I got spoiled with the scones recipe from the Sweet Melissa Baking Book, my preferred scone recipe that makes a lovely, as moist as a scone can be, scone.

All in all, these weren't bad. And I'm glad I got to try sort of, almost, but not quite Nutella.

This recipe was hosted by Lorraine, so go over and check out her blog for the recipe.  Check out the Baked site for the other baker's takes on this one!

**We were recently at a party with the hub's co-workers and their families. One of the other girls said something about wanting almond butter, and did I know anywhere to get it, to which I replied "Just make it." Not realizing that this was weird until the hubs called me out on it. Outcast for life. Thanks, Mom.

Orange you glad...


The hubs and I recently went to San Diego, California. Can you believe it was my first trip ever to California? It was a fun time, with a stop at the ocean, avocado pickin', and relaxing.

This is also the technique we use for changing our air filters.

While were we there, we picked some oranges and citrus fruits of all kinds, and brought home a bounty! Now that my kitchen is full of citrus, I am slowly but surely finding some tasty recipes involving the tart, sweet little fruits. In addition to just eating them, of course, because I can assure you that you haven't really lived until you eat a perfectly ripe orange just off the tree (and proceeded to get juice all over your fingers!). I also tasted my very first kumquat. They are as fun to eat as they are to say. I think I may have forever ruined my taste for store bought oranges...

For the first recipe, I wanted to use up the blood oranges*. We only had a few, but they were beyond ripe, so I wanted to use them quickly before they went the way of the compost. A quick browse of the internets and I found a recipe for a Flaky Blood Orange Tart from Food and Wine. You know I love anything in a flaky crust, and the hubs likes anything resembling a cobbler, so this seemed like a great use for the blood oranges. Plus, it wasn't fancy or complicated so I could easily assemble it and get this - stash it in the freezer - to be made later. Of course, it didn't really last that long (really only the minimum 4 hours...) but it's nice to find a recipe that you can make ahead and whip up quickly when needed. A half recipe made about four to six servings.


While not fancy, this dessert is pretty in it's own right, with the vibrant colors of the oranges shining through like a little stained glass window. It smells amazing, but most importantly, tastes great. It does have a cobbler like flavor with the buttery crust, tart oranges and the addictive sweetness of liquid crack salted caramel syrup. Definitely make the syrup.


I tried to get photos of this before we ate it, but I wasn't so lucky, which is why I've taken strategically partial tart pics. That other half of the plate...it's empty. And then when I wasn't looking the hubs snacked on even more! At least I know he liked it.

Since we now have so much citrus, I'm sure I will be posting more recipes shortly. Leave a note in the comments if you have any favorite citrus recipes that I should try!

*This was also my very first blood orange!


Club Baked: Speculaas

I must be the only person on the planet that hasn't heard of these little cookies, similar to the Biscoff cookies handed out on the airlines. So, I really didn't know what to expect, other than a very spicy cookie...that I could gather from the ingredients - cloves, ginger, nutmeg and cinnamon in quantity.

What I didn't know was that they would be terrible -

- terribly easy, that is.

I almost didn't think that after a quick pulse in the food processor and a minute of hand mixing that my batter* was done. After a pop in the fridge, a roll with the rolling pin and a quick (15 minutes!) bake in the oven, the cookies were out, smelling delicious and ready to eat.


And, in addition to the ease of preparation (and ease of cleanup - I think I used two dishes!), they are quite good. These cookies are dry and crispy. I normally am not fond of dry cookies, preferring them ooey and gooey and with chocolate chips. But these weren't dry in a bad way, more like a perfect compliment to a cup of coffee or tea, or in my case, a chai latte. (I will say that I did love them right out of the oven, still warm and a bit soft)

I do think that their spicy flavor makes them the perfect fall cookie, or holiday cookie for that matter. I know I will enjoy the break this cookie provides next year during the stressful, over the top holidays. It's so simple, but delicious. Can't ask for much more...

Club Baked ended up co-hosting this recipe with Baked Sunday Mornings, a group that also is baking it's way through these delicious desserts, so you'll find the recipe over there this week. To see all the bakers links, check out the Club Baked site.

*I ended up using lemon zest in place of the orange zest since I had no oranges on hand. I found it hard to taste with all the spice, so I'm not going to say if it affected the flavor, although I can see how orange would be the preferred compliment to those spices.

**pictures coming soon...

Club Baked: Mississippi Mud Pie (A)

aka Coffee Ice Cream Tart

When asked what I would like to host for Club: Baked, I sat down with the hubs and the Baked Explorations cookbook and discussed the possibilities. I was asked to pick something from the pies and tarts section, which for me was just perfect. I prefer pies, with their ease of preparation, their forgiving nature, and of course, the lack of scientific, precise measuring that make so many cake recipes downright frustrating for me. And this recipe had no flour which, for someone who has a flour bomb go off regularly while baking, also includes less clean up. Right around my hosting time, we were having a pretty over the top dinner, so I wanted something just a little special. With some hemming and hawing (debating between this and the Whiskey Pear Tart, apparently we like booze in our desserts), we finally settled on the Mississippi Mud Pie (A).


Of course, after just discussing the ease of preparation of most pies, I landed with the one that has so many steps. Luckily, each step is fairly easy, a simple stirring of ingredients and a pour into the pie shell, so what looked initially like a daunting recipe turned out to be pretty easy and straight forward. Although, all the stopping and starting in between steps dragged it into a two day process for me.

I started with the making of the ice cream. The Baked guys have a recipe for Coffee Ice Cream in the cookbook, but since I didn't have any instant espresso powder, or Kahlua, I ended up adapting my almond milk ice cream recipe. I simply added just a pinch over 1 1/2 cups of whole coffee beans to the milk base after the first simmer, and continued to heat on low for about an hour, maybe two. Until it tasted like a strong latte. After scooping out the beans and discarding, I added another 1/2 cup milk and 1/2 cup cream to compensate for the of the liquid that evaporate or got tossed with the beans, stirred and voila! Coffee Ice Cream. 

After making the ice cream, I set about making the crust. After scooping mounds of icing from the center of each sandwich cookie, I was able to use the wafers to make the crust. (Was anyone able to find just the wafer part? Please tell me where you get such a thing!)\


The bourbon fudge...let me pause a moment here.  Bourbon AND Fudge. These are pretty much two of my favorite things and together and, well, let's just say that I had no dirty dishes.


Cookie Crust, check.

Bourbon Fudge, check.

Toasted Pecans and Coffee Ice Cream, check and check.

More bourbon fudge, check, check, and check.


A little freezer action and some sparkly candles, and this thing was ready for it's debut.


This pie was incredibly rich. One of those desserts where just a little sliver will fulfill your sugar/chocolate/ice cream craving. For someone who eats a Dove dark chocolate to satisfy a sugar craving, this was super sweet.  I loved the coffee ice cream. For me, that was the best part. Next time, I would add more pecans maybe even mixing them into the ice cream. They offered a texture change with their crunch and cut down on the crazy sweetness of the rest of the ingredients. I would also skip the chocolate drizzle on top simply because it was such a rich pie, I didn't feel it really needed it. Okay, probably a light chocolate drizzle for, as my husband says, "flair." (Love that guy!)

Also, grease the pan! I guess I missed this step. But I had a h*ll of a time getting out the first slice. The second was a little better, but I think a light greasing would have solved the whole mess.

I think the best thing about learning to make this pie is the sheer volume of possibilities it opened up, and to me, that's the mark of a good recipe. One that introduces you to something that you can build on. Tweaking the ice cream and fudge flavors and even the toppings and you have an almost limitless amount of ice cream pie possibilities. Graham cracker crust, caramel in place of the fudge with a vanilla ice cream topped with pecans would be a nice fall treat. Maybe served with some warmed spiced apples. Kind of a Kriss Krossed apple pie a la mode. For Christmas, peppermint chocolate fudge with candy cane ice cream. Plain fudge and caramel ice cream topped with nuts for a toffee flavored ice cream pie...

Thanks everyone for baking along! Next up: Speculaas by Fiona: Ms Fifikins

Mississippi Mud Pie (A)
Yield: One 9" Pie

Ingredients

For the Chocolate Cookie Crust
30 chocolate wafer cookies, about 6 oz
1 tbsp granulated sugar
6 tbsp (3/4 stick) unsalted butter, melted


For the Filling
4 oz good quality dark chocolate (60-72%)
1/4 c plus 1 tbsp heavy cream
3 tbsp unsalted butter
2 tbsp light corn syrup
1 c confections' sugar, sifted
1 tbsp Kentucky bourbon
1 pint good quality coffee ice cream
1/2 c toasted pecans, coarsely chopped


For the Bourbon Fudge Topping
2 tbsp heavy cream
2 tbsp unsalted butter
1 tbsp light corn syrup
3 oz good quality chocolate (60-72%)
1 tsp Kentucky bourbon


Make the Chocolate Cookie Crust
In a food processor, pulverize the wafer cookies into a very fine crumb. You should have about 1 1/2 cups. Place the crumbs into a bowl, add the sugar and stir until combined. 


Pour the melted butter over the crumbs and mix well. Transfer the crumb mixture to a 9-inch pie plate and press it into the bottom and up the sides. Use the back of a large spoon to get an even crust. Set the crust aside in the refrigerator. 


Make the Filling
Place the chocolate in a large heatproof bowl. In a medium saucepan, bring the cream, butter and corn syrup to a simmer. Remove the mixture from the heat, pour it over the chocolate, and let sit for 1 minute. Then whisk the chocolate mixture until it is completely smooth. Whisk in the confectioners' sugar and bourbon.


Spread the fudge evenly over the bottom of the pie crust, cover it and refrigerate for 2 hours.


Soften the coffee ice cream by placing the container in the microwave for 10 seconds on high. Put it into a large bowl and use a rubber spatula to beat it until it is slightly malleable. Spread the ice cream over the chilled fudge filling, sprinkle it with pecans, gently pressing them into the ice cream, and freeze the pie for about 1 1/2 hours, or until the ice cream is firm.


Make the Bourbon Fudge Topping
In a small saucepan over low heat, heat the cream, butter and corn syrup together until the mixture beings to simmer. Remove the pan from the heat and add the chocolate. Whisk until the fudge is smooth - if you still have a few stray chocolate chunks, reheat the mixture over very low heat until they are completely melted. Stir in the bourbon. 


Beat the fudge topping until it reaches room temperature, and pour it over the ice cream and pecan layer in a zigzag pattern. Freeze the Mississippi Mud Pie until it is set, about 20 minutes. To serve the pie, cut it with a warmed sharp knife. 


The pie will keep in the freezer, tightly covered, for up to 4 days.

Club Baked: Sawdust Pie & Homemade White Chocolate

This week's recipe is hosted by Tessa of The Cookin' Chemist and she selected Sawdust Pie. I'll be honest, I was a bit hesitant to try this one. The name was not the most appetizing and there wasn't a photo in the book indicating what to expect. But since I was busy studying for my licensing exam and missed the last two Club Baked picks, I thought I should give this a try. And I'm so glad I did!


The pie itself was easy to assemble with some prep - making the pie crust and white chocolate. (Sidenote: these two steps took longer to make than the actual pie, which shows you just how easy and quick this pie goes together) Due to that pesky cow's milk allergy, I can't have regular white chocolate since it contains milk powder. I thought about omitting the white chocolate all together and just using dark, but I also really wanted to try to make the white chocolate as I noticed a few other Baked recipes used them as well. The homemade white chocolate was the only substitution that I had to make in the entire recipe and I think it helped make the pie less sweet overall.  

Recipe for white chocolate at end of post.


For the pie crust, I stuck with the basic recipe found in Baked: Explorations with one minor change. I substituted vanilla sugar for plain granulated. I keep vanilla sugar in my pantry and sneak it in to all kinds of baked goods and the pie crust seemed like the perfect place.


Once I had the pie crust assembled, the rest was easy peasy. A few pulses of the food processor on some graham crackers and pecans, a little shaving of white chocolate, a handful of dried, unsweetened coconut and some scoops of sugar and I was almost done! I'll admit I was concerned about the coconut flavor in this pie. I like fresh coconut, but the dried stuff I normally have a texture aversion to, but in this pie, it is barely noticeable with all the other strong flavors and doesn't stand out texturally with everything else.


I couldn't help sneaking in 2 ounces of  semi-sweet chocolate, though. I was so happy I added this when I tasted the pie. The bite of the semi-sweet chocolate really complimented the nutty sweetness of the pie. After adding the (6!) egg whites and filling the pie crust, it was time for the oven. (Don't worry about those 6 egg yolks, I feel some ice cream making in my near future...Come to think of it, a scoop of cold ice cream would go fabulously with a warm slice of this pie...)


This pie was easy to make and tasty to eat. Sort of a less sweet, less syrupy version of traditional pecan pie. I served this pie warm, with a big, fat dollop of homemade whipped cream to some of the hub's friends. After looking skeptically at something called "Sawdust Pie" and quizzing me on ingredients a few times, each took a slice and cleaned their plates. Success!

Thanks to Tessa for choosing this recipe that I never would have given a second thought without her prompting. It's a great fall pie and would be a great dessert offering for Thanksgiving. Check out her blog for the recipe. Also, check out other baker's links here.


White Chocolate 
adapted from this recipe


2 oz. food grade cocoa butter - They carried this at my Whole Foods, but you can purchase online as well)
1/2 tsp vanilla extract
1/3 cup powdered sugar
1/2 tsp goat's milk powder
itty bitty pinch of salt


Melt the cocoa butter in the microwave in a microwave safe dish. I used a Pyrex container with a lip to pour so it is easier to fill the molds later. Start with 2 minutes and add 1 minute at a time until all the cocoa butter solids are liquefied.

Using a pot holder, remove the cocoa butter from the microwave and stir in the extract, sugar, milk powder and pinch of salt. Continue to stir until all of the ingredients are incorporated and melted into the cocoa butter.

Pour the mixture into mold. I used silicone cupcake molds that I had on hand. An ice cube tray would work, too if you don't have candy molds. You could buy a fancy candy mold if you want, but it's not necessary. Then simply place the molds into the fridge to harden and a few hours later, you have great tasting, smooth, homemade white chocolate. :)

making ricotta at home

I've always wanted to make cheese. Seriously. When I was a kid in the bathtub, I would take the crate that my toys were in, dump the toys and pretend to "cut" cheese (no, I didn't do that, you're gross!) like I saw on Mr. Roger's. 20 years or so later and I finally really did it!


I decided to make ricotta because it is most definitely a beginner's cheese. Plus, finding ricotta made with sheep or goat's milk in the states is impossibly difficult - and with the Italian we eat in this house, a solution to this problem was needed. Ricotta is more traditionally made with sheep and goat's milk, so no risk of it turning out super weird by substituting milks (Is this ever a problem? I don't know?)

After some research, I decided to try a few different methods. The first one I tried had you heating the milk until just below a simmer then stirring in the acid. But those directions were not specific enough. My simmer differed from the authors and led to ... nothing. Turned up the heat as suggested and went a little too hot. I did end up getting this to work using a thermometer and some more precise directions, but trying to keep such a specific temperature for such a short time ended up being quite an involved process which I found ridiculously, unnecessarily complicated.

The second method I tried was easier than boiling water. Pour milk and acid into a pot, let sit 24 hours. Place pot on stove and heat on low for 1 hour. Remove from heat and let sit 30 minutes. Strain. I think that's a recipe short enough to tweet, even though I don't tweet.

I like it.

I also liked making it. I mean, it was easy. I found that I needed to heat mine to about "2" on my stove, but I do suggest starting at the lowest setting and only increasing if you find it's not getting hot enough. I make mine in 8 cup batches (1/2 gal). I have made it with 1/4 c. vinegar and 1/4 c lemon juice, both of which worked equally well.

Using goat's milk, it is more expensive than buying Ricotta Salata and re-hydrating it, but it's waaaay better. It's much creamier and adds a little something to the recipes that was lacking when using the drier Ricotta Salata. I think Ricotta Salata is an acceptable substitute in a jiffy, but when cheese is the star of the dish, I would consider making your own ricotta.

Have you ever made cheese? If so, what kind? 


Eggplant & Tomato Galette

A while back, we had made Andrea's Caramelized Onion & Zucchini Galette. It was delicious and, despite the fact that it had no meat, Nick said that he really liked it. The leftovers in particular worked well in his lunch (he never had time to heat up lunch and regularly ate leftovers cold). So, we knew we were galette fans. Immediately, we started to think up other ideas for galettes but they fell by the wayside as we became busier and eventually we forgot all about them...


We had an extra eggplant lying around and needed something to use it up. So often, eggplant is relegated to the side dish area of a meal, but we had a whole eggplant so a little more than side dish material. After some deliberation, this recipe came to be.


I happen to love it. The eggplant gives it enough "meaty" material that it's filling while the tomato and feta sauce give it a bright, tangy note that compliments the earthiness of the eggplant. The light crust of the galette dough keeps the meal from getting too heavy. They were yummy straight from the oven and eaten cold as leftovers (well, Nick says so).
Eggplant & Tomato Galette

Ingredients:
1 recipe galette dough (recipe follows)
1 recipe feta sauce (recipe follows)
1 small eggplant, sliced thin & sweat with salt
3-4 plum or on the vine tomatoes (we used Campari), sliced thin
salt
pepper
basil leaves, chiffonade, optional
feta crumbles, optional


Roll the galette dough onto parchment or wax paper to form a 10" circle. Place in the refrigerator to rest for 1 hour. Remove the dough from the fridge and roll (on a floured surface) to form a 16" diameter circle. Place the rolled out dough on a cornmeal dusted pizza peel or lined baking sheet.


To assemble the galette, start by spreading the feta sauce onto the galette dough, leaving 3 inches around the edges. On top of the sauce, arrange the eggplant in a slightly overlapping spiral pattern around the galette, moving towards the center until you have covered the surface. Evenly top with tomato slices and lightly salt and pepper the assembled galette.

Once assembled, gently fold over the edges of the dough to form a "crust." Start by folding a small portion of the dough onto the assembled portion and continue to pleat the dough until a circle has formed holding all the contents in place.


Bake the assembled galette in a 350 F oven for approximately 45 minutes or until the crust is slightly golden and cooked through.


Galette Dough:


Ingredients:
1 1/2 c flour
1 t table salt
1 stick butter diced
1/4 c sour cream
1/4 c ice water
2 t lemon juice

In a food processor, combine flour, salt and cold butter. Pulse 10 times (1 second each) to form crumbles. Mix in the sour cream, ice water, and lemon juice and pulse 10 more times, until the mixture starts to form a ball. Remove from the food processor and place on a silpat or parchment paper. Press out into a 10" diameter circle, cover with plastic wrap and place in the refrigerator for at least 1 hour.


Feta Sauce:
adapted from this Food Network recipe


Ingredients:
2 c. plain yogurt
1/2 c. feta crumbles, well drained
1 tbsp. extra virgin olive oil
1 1/2 tsp. minced garlic
1 1/2 tsp. lemon juice
1/4 tsp. salt
pinch cayenne
1 tbsp. dried mint leaves


Line a strainer with a layer of cheesecloth and place over a bowl. Place the yogurt in the strainer and refrigerate. Let the water drain from the yogurt until the yogurt has reduced to 1 cup. It will take about 2-3 hours.


Combine the feta, olive oil, garlic, lemon juice, salt and cayenne in a blender and blend until smooth, adding more oil if needed. Add the yogurt and pulse to combine. Also add in the mint and blend until combined. This can be made in advance and stored in the refrigerator.

Reaping the Benefits...

...of a husband who loves to plant things. Seriously, he has the *Midas Touch* in gardening. Don't believe me? Just check this out:


Nick came in from our balcony and said bluntly - "We need to eat chard, like today," and passed me a big, lush bouquet of chard.


I love chard. It's one of those veggies that is really so versatile. Sauteed with a little garlic and onion and you have a simple side dish that compliments almost any meal. It's an easy substitute for spinach in dishes like pastas and ravioli fillings. I've also used thin, wilted strips of chard in quiches and the like.

I felt like something a little different, so I consulted my How to Cook Everything cookbook by Bittman. He had a simple, but flavorful recipe for chard with olives, shallots and feta. It was simply scrumptious. It was relatively easy to prepare. I made it while our pasta was cooking and the clam sauce was simmering on the stove.


Nick mentioned that this would also work well as a stuffed mushroom filling, mixed with a little bread crumb, for a quick appetizer. The saltiness from the olives and feta would be nice with the earthiness of mushrooms.

Snack Break: Salmon and Cream Cheese Crackers

I'm pretty sure that it's quite obvious that I am an avid snacker. When I had a desk job, I'm pretty sure that if you stopped by my cubicle, chances are I would be munching on something. And while I certainly love a cookie now and then, regular snacking usually consists of more savory foods. Sliced apples being a particular favorite.


My favorite thing about snacking is the relative ease in preparation. This "recipe" is no different. Crackers spread with cream cheese, topped with just a bit of salmon. Add a sliced apple and you've got yourself a light lunch.

For an easy alternative, if salmon leftovers never occur at your house, try adding smoked salmon in place of the leftover salmon.

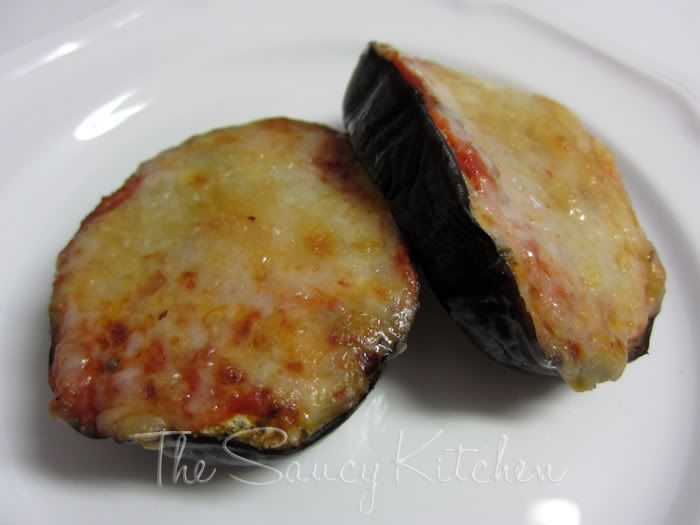
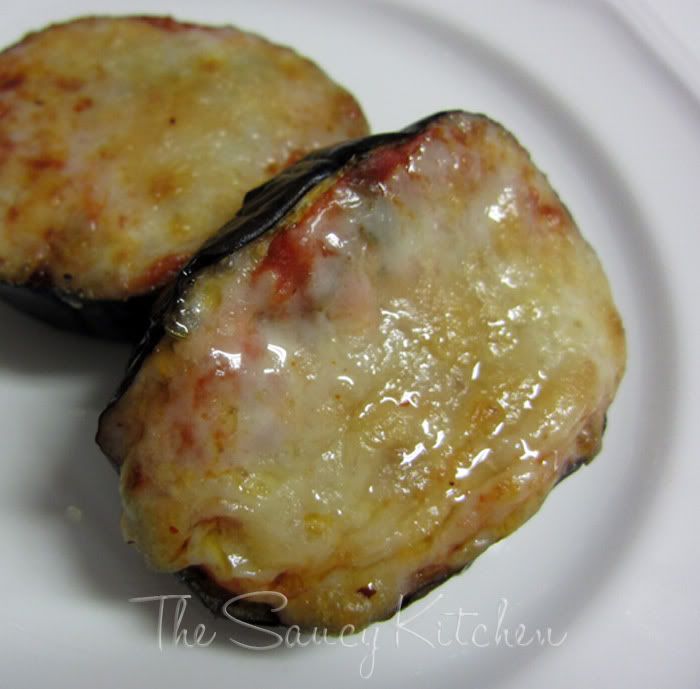
Quick Fixin: Eggplant Pizzas

This meal is so utterly painless you'll wonder afterwards if you really cooked dinner. But the flavor will ensure your taste buds and your appetite that yes, you have.

The active cooking time for this dish is hmm...5 minutes? Ok, maybe 10 - if you use freshly grated cheese. It's just the type of dish that I've been looking for though, since the weather has started to warm. It's light, but flavorful. Served with a side salad (with fresh from the garden arugula) and some bread for dipping and you have the makings of a lovely meal.


Eggplant Pizzas
adapted from Julia's Kitchen Wisdom

Ingredients:
1 (or two) eggplant
salt
pizza seasoning
your favorite jar of tomato sauce
your favorite pizza cheese, grated  (I used a combination of Rustico Red Pepper and Cacia de Roma)

Preheat your oven to 400 F.

Cut the eggplant into 1/2" thick rounds and sprinkle lightly with salt. Lay on towels so that the towels will absorb the moisture the eggplants "sweat" out. Let them rest and sweat their moisture for 20-30 minutes.

After the 20-30 minutes, pat the eggplants dry and place them on an oiled baking sheet. Brush the tops with olive oil and sprinkle on your herbs. Cover the baking sheet with foil and bake for 20 minutes, or until tender.

Remove the rounds from the oven, top with a spoonful or two of tomato sauce and sprinkle on some cheese. Broil the rounds until the cheese has browned. Plate and serve.

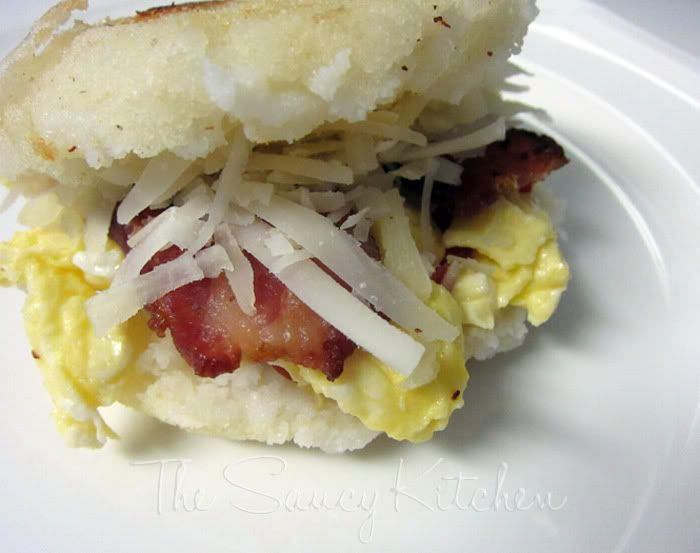
Arepas!

Arepas!


It even is fun to say! Anyways, I was introduced to this great breakfast idea by Nick's old roommate. He and his family are originally from Venezuela and this was a common breakfast for them. I think of it as a South American English muffin sandwich. They were cool enough to have an arepa maker (like a waffle maker, but for arepas). We used our hands.

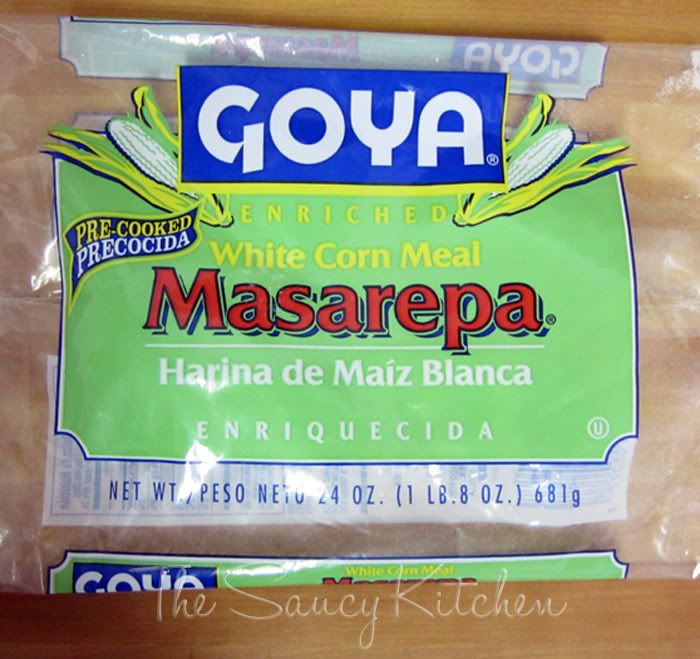
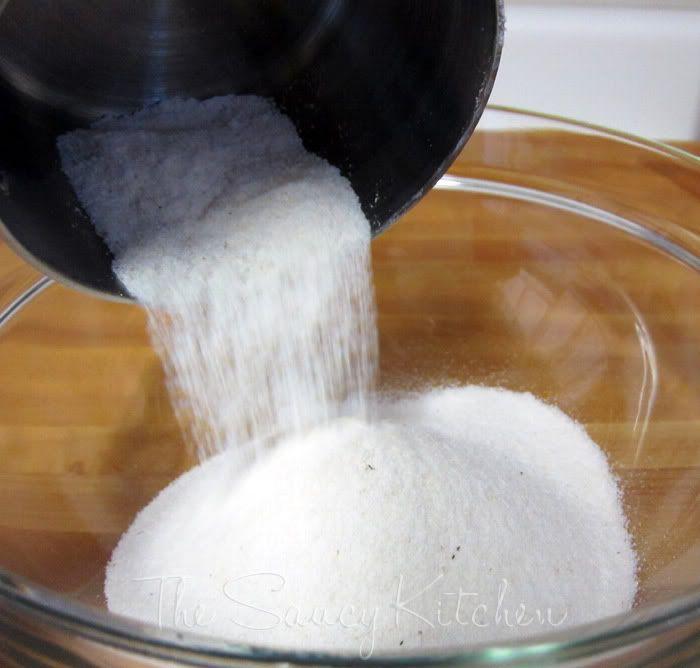
The hardest part is actually finding the flour. It's a white corn meal. Here's the stuff we found in our grocery store to give you an idea of what to look for if you want to try these.


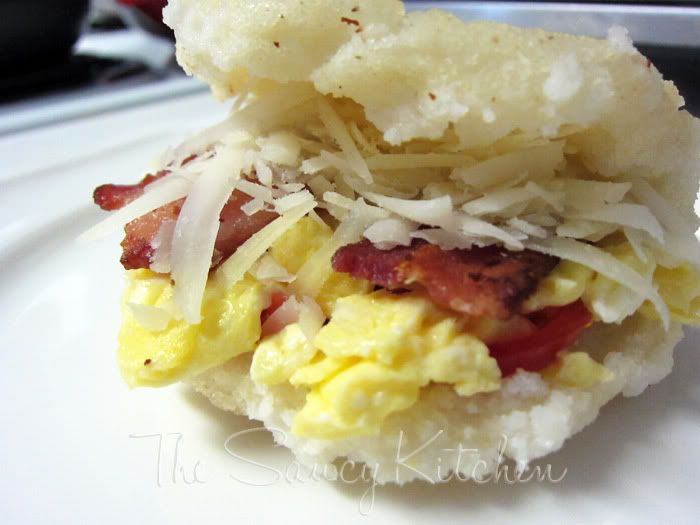
They are so yummy and can be modified to include whatever fillings you have on hand, bacon and eggs, ham and cheese, avocado, tomato, etc.

Arepas

Ingredients:
2 c. Masarepa
1 tsp. salt
3 c. warm water
olive oil
fillings of your choice

Preheat an oven to 350 F. 


In a mixing bowl, combine the flour, water and salt together with your hands until it is combined. Let it stand for 5 minutes.

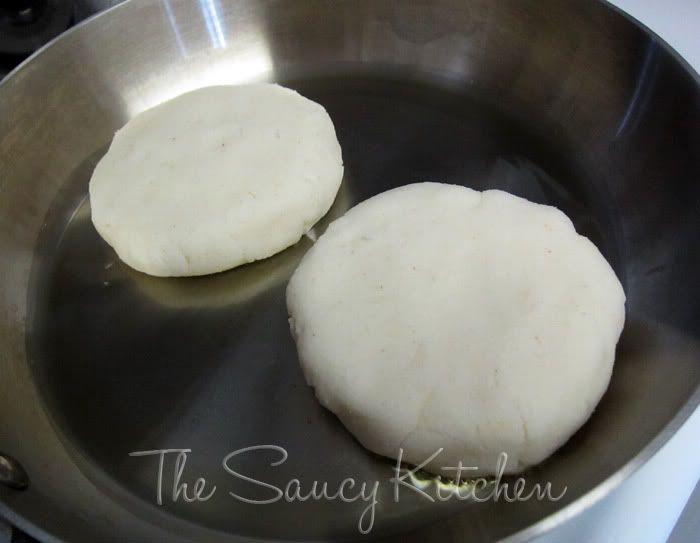
Shape the dough into patties about 4 inches wide and 1/2 inch thick.


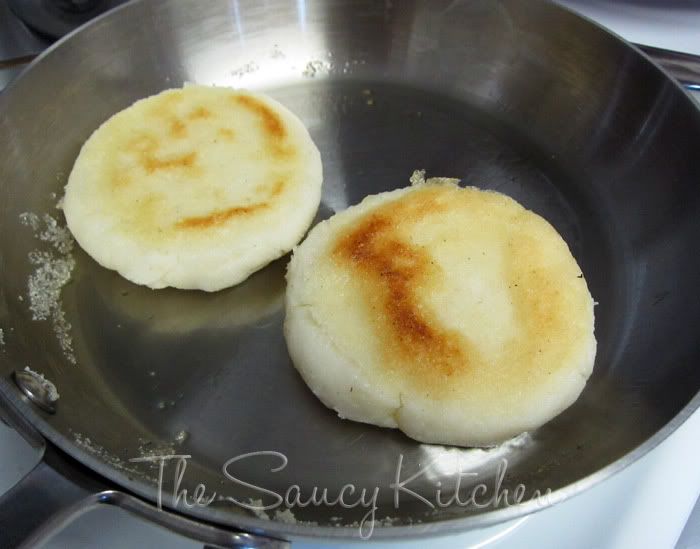
In a lightly oiled skillet over medium heat, place the formed patties onto the pan. Don't try and move them once they are on the skillet. Allow them to brown on one side and then, when they are brown and no longer sticking to the bottom of the pan, flip them to brown the other side.

Place the arepas on a baking sheet and into the oven for about 20 minutes (or until they sound hollow).


Slice the arepas about halfway through and take out some of the dough if you want (it gives more space for filling). Add in your fillings, really pushing them in so it fills the whole inside of the arepas. Enjoy!