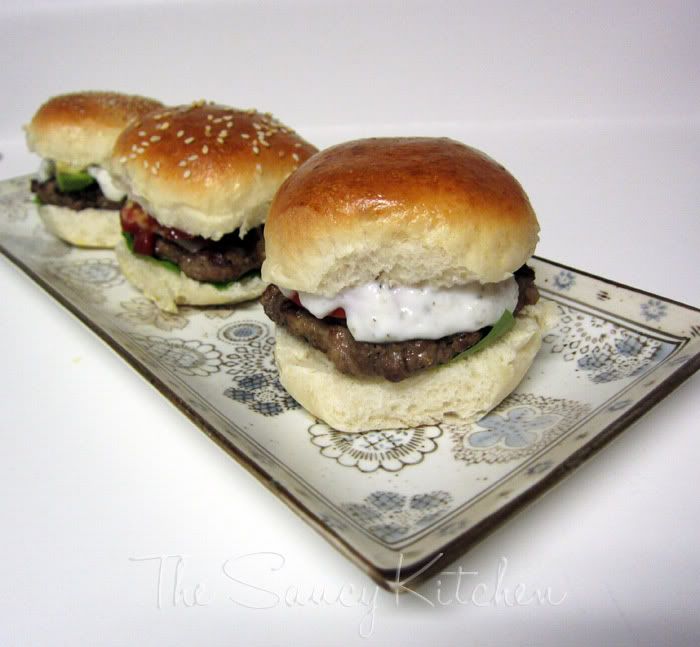
Lamb Slider Trio

We got leg of lamb for $399/lb. $3.99 A POUND! We had a small roast and then ground the rest, thinking that we could come up with many more recipes for ground lamb - one being lamb burgers. But we never had a lamb burger and didn't know what to pair it with.


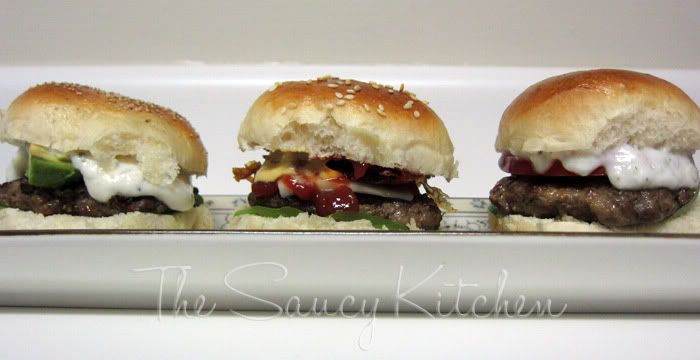
So we did what every indecisive couple with a serious cooking hobby would do and experimented with the top three contenders - Greek, Middle Eastern, and American.


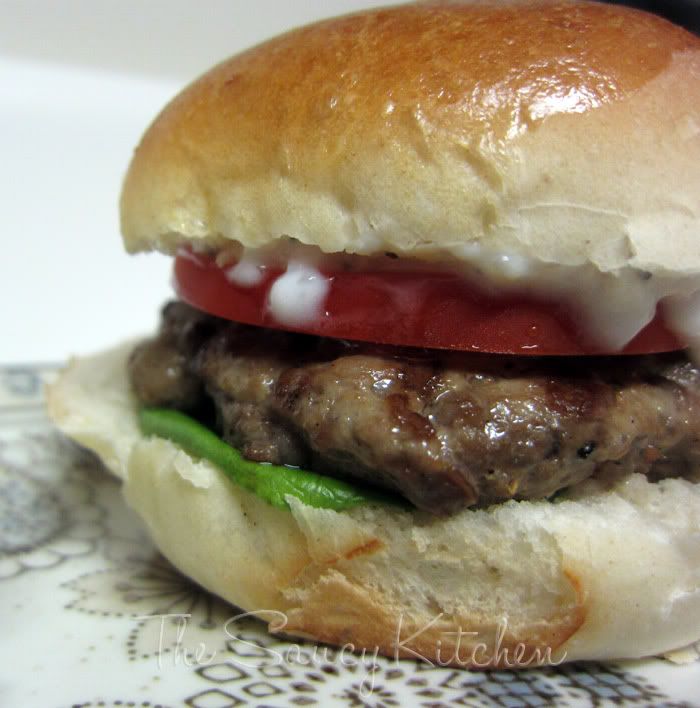
The Greek burger included sliced tomato, a slice of romaine and some tzatski sauce on a plain bun.


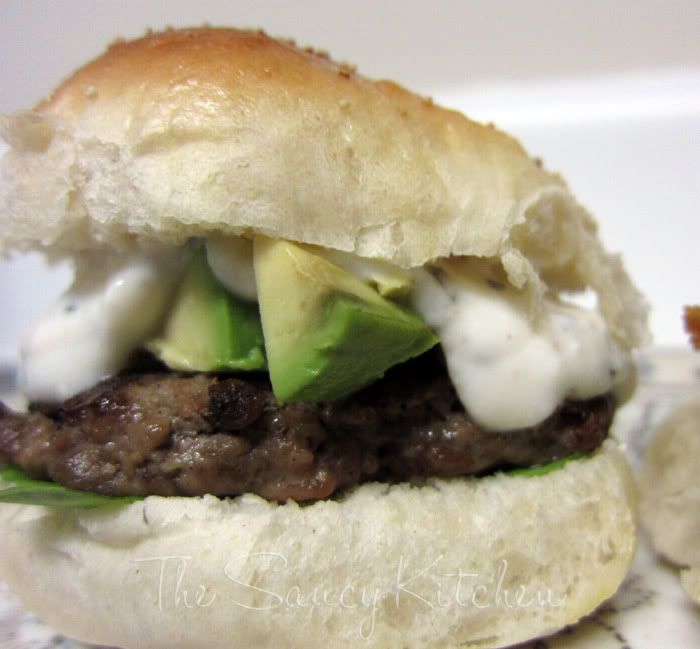
The Middle Eastern burger included a slice of arugula, a feta/mint/yogurt sauce, and avocado on a poppy seed bun.


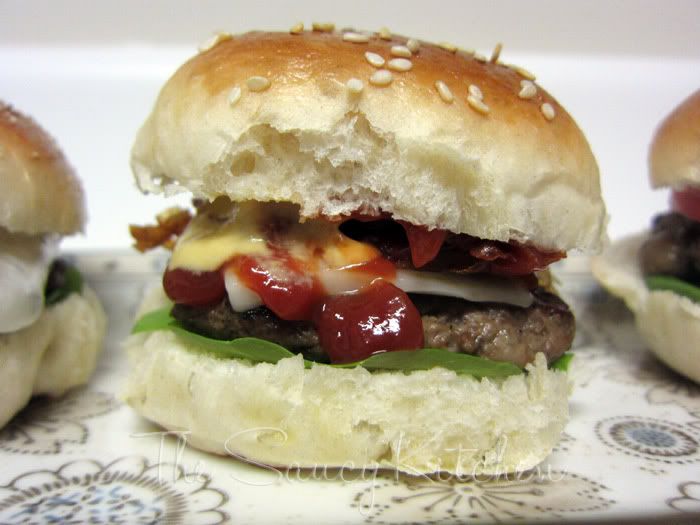
The American burger included ketchup, mustard, goat's cheddar cheese, crisped prosciutto, and a slice of arugula on, what else, a sesame seed bun.

I tried to get Nick to rate them, but he couldn't. He said they were all good. I did, but honestly, it was so close.

My favorites:
1. Middle Eastern
2. American
3. Greek


All to watch Worst Cooks in America. How was your weekend?

Stuffed Artichokes

I made this up for dinner when Nick was feeling under the weather. I needed something quick and easy and full of pantry staples because a trip to the store was not happening. It was a great light meal in and of itself, or could be served as a side or appetizer.


Stuffed Artichoke

Ingredients:
2 artichokes
2 bay leaves
salt
1/3 c. yellow onion, diced
2 tbsp butter
2 garlic cloves, minced
pepper
pinch oregano
2/3 c. diced tomato, canned
1 tbsp butter
1 tbsp olive oil
1/2 c Pecorino Romano
1 1/2 c. bread crumbs
2 tbsp chopped fresh parsley


Preheat your oven to 400 F. Bring water to a boil in a large pot. Add two bay leaves and some salt to season the water. Add in prepped artichokes* and prepped stems** (optional). Continue to boil lightly with the lid on until you can stick a fork through the base (about 25 minutes).


While the chokes are boiling, prepare the stuffing. Start by heating the butter in a saute pan over medium heat. Add the onions and cook until they are just soft and transparent, about 5 minutes. Add the garlic and saute for about 1 minute. At this point, check to see if the stems are cooked through. If they are, remove them from the water and dice (be careful they are hot - I held mine with tongs while I sliced), then add to the onion mixture. (If they need a few minutes, add them in after the tomato). Add the tomato and stir, continue to cook until the mixture reduces. Add pepper and dried oregano to taste. Once reduced to the desired consistency, reduce the heat to low.


In another pan, melt the butter and olive oil together and heat over medium low heat. Toss in the bread crumbs and toast.


Once toasted, remove from the heat and toss in the cheese and parsley. Add the bread crumb mixture to the tomato-onion mixture and stir to combine the two.


Once the artichokes are done, remove them from the water and sit, facing down on a towel or in a colander to drain and cool. Once cool enough to touch, open up the leaves just enough to get to the center leaves. Pull out those little leaves until you can see the bottom fuzzy parts. Grab a spoon and scrape (gently!) the fuzzy part out of the center, leaving the solid, fleshy part (aka, the best part).


Once the center has been cleaned of all the fuzzies, add in the stuffing. I first add to the center portion and then fill in between each of the leaf layers. Once both have been stuffed, place the artichokes into the oven for another 10-15 minutes. This will re-heat the chokes and crisp up the outer edges of the stuffing.


Remove from the oven and serve.
* To prep the artichokes, cut the stem around the base of the plant. Also cut off the about 3/4" below the top point. I also like to trim (with kitchen shears) the pointy end of each leaf.

**I also save the stems, cutting off the very end that's usually brown and slicing off the green woody parts vertically until I reach the tender white inside of the stalk. It is only really worth it if the stems are thick.

New! Menu Planning Resources

Since I believe in menu planning, I've decided to offer some printable menu planners for your personal use. You can find them up on the new Resources tab. Some are self explanatory and supplemental to menu planning - a grocery list (to tape on the fridge, so you can just jot down things when you run out - saving the forgetful among us) and a recipe list (to write down new ideas or recipes you want to try).
Click on the image to be redirected to the Resources tab for download instructions.
There are also weekly and monthly menu planners you can use however you'd like. I've also placed our menu plan (with subtitles) in there as well. I started planning monthly recently, as opposed to weekly, because Nick was always requesting things during the week and we would end up with a giant list of requests. If he's throwing out ideas, I might as well capitalize. Also, it allows us to have a bit more forethought into using our freezer stash, ultimately cutting down our grocery bill.

Yes, we are ready for the apocolypse.
 Here's how it works:

I have each day in one box. I mostly plan lunch and dinners so it's not too complicated - especially when lunch is usually last night's dinner. Under each day I've also included subtitles. These indicate different meal categories which helps to balance out our menu since otherwise Nick would put steak on there every day.

Sunday is the day we can try new recipes since we have the time to do so. Monday through Friday offer quicker cooking ideas like grilling, pastas, prepared (but homemade) freezer meals like pyrohi and ravioli, or a baked pasta. Salad night can include some meat - steak, chicken, shrimp - if it kills you to go meatless. Pantry meals include spaghetti an meatballs, pasta rustica, etc. - anything that can be made from items commonly found in the pantry. These are usually also quick and easy. Craving night is still planned. We write down what we are in the mood for and it gets put on the next available craving night unless it can go in one of the other categories.

These were categories that worked for us. Perhaps you have a weekly out to eat night on Thursdays for pizza - Retaurant night becomes Thursday. If you want to have a Meatless Monday, go for it. Attached to your slow cooker? Take a mid-week cooking break with Slow Cooker Wednesdays. You get the idea. Just keep the categories flexible enough that you aren't eating the same thing every week. Pasta night could mean spaghetti with tomato sauce, it could mean orzo with peas, linguine in clam sauce, or mushroom lasagna. If menu planning becomes monotonous and boring, it becomes less appealing to do.

Don't get too worked up about the days, either. They are meant to act as a guide so that your menu is more or less balanced and to prompt an idea if you are hitting a menu planning rut. But if you think of a recipe you'd like to make and it doesn't fit into an open category, don't not make the recipe! That's just silly. Throw it in where you can. They aren't there to be restrictive.

Click to enlarge

Above is our menu plan starting on February 13th. I did add some breakfasts on there (in green) since I'm currently hanging out at home, so I might as well eat well. The orange-y color represents lunches. The black text indicates dinners. You can see a few lunches labeled "leftovers" and some dinners labeled as "open." This is so that any accumulated leftovers get eaten up. Sometimes we end up with more left over than we bargained for and so scheduling a few days a month (or once a week) to eat them limits the amount that gets shoved to the back of the fridge, forgotten, and subsequently thrown away. "Open" days are also a good time to make dinners that you skipped if you ended up getting invited out to dinner another day and didn't make one of the scheduled meals.

You can plan an entire month out in one day, or by attaching a blank sheet to the fridge (or where ever is convenient for you), you can begin adding recipes to the next month as your family requests them. If I hear "Hun, I really think lamb sliders would be awesome," they get added onto the next month - perhaps on grill night or on craving night. This way, you don't have to sit down and plan an entire month in one sitting, it evolves over the previous month, leaving you a few little holes to fill in without much time or effort.

If you menu plan, what are some tips that you would suggest to those just starting out?

Entries for the giveaway close at 12 noon today! So hurry up and enter here.

Happy Valentine's Day!


Hope you all are having a great day celebrating with your Valentine. Mine is in the kitchen making pesto...mmm...

Last night, for an early V-day dinner, we made a roasted leg of lamb ($3.99/ lb!) with a red wine sauce which we served with some roasted cauliflower covered in a Drunken Goat cheese sauce and a loaf of ciabatta bread (no, we didn't eat it all last night, silly).


This morning we had a yummy breakfast of crepes filled with  fresh strawberries in maple syrup and topped with homemade sweetened whipped cream. And, of course, a cup of coffee. Perfect start to the day.

Coconut Cake with Cream Cheese Icing

Me and coconut have a funny relationship. We're just getting to know each other. See, I always, always thought of coconut (especially the shredded stuff) as being dry, gross and texturally unappealing. The thought of it gave me shivers. I should have known better - I think the only time I had shredded coconut was on a grocery store bakery cookie. You know the freebie kind they give kids so that their parents have one half-minute of peace before the sugar rush kicks in? That coconut. No wonder we had issues.


But this coconut I can get behind. Unfortunately, it also is quite a lengthy process, but so worth it. If you aren't a purist, you could use store bought extract, coconut milk, coconut cream and shredded coconut which would make this a much faster cake, but I wanted to try it with fresh ingredients first. It turned out great - soft, moist, sweet but not overpowering. I think the fresh coconut adds a lightness that you wouldn't get with the store bought shredded stuff. If I do ever make this with store bought ingredients, I will definately share with you it's shortcomings if there are any.


Coconut Cake
from this recipe from Alton Brown
icing recipe from the Barefoot Contessa


Ingredients:
Vegetable Oil
14 1/4 ounces cake or pastry flour, plus extra for pans, about 3 c.
1 1/2 tsp. baking powder
1 tsp. salt
1/2 c. fresh coconut milk*
1/2 c. fresh coconut cream*
8 oz. unsalted butter, at room temperature
16 oz. sugar, about 2 1/4 c.
1 tsp. coconut extract*
4 egg whites
1/3 c. coconut water*


1 lb. cream cheese, at room temperature
2 sticks unsalted butter, at room temperature
3/4 tsp. vanilla extract
1/4 tsp. almond extract
1 lb. powdered sugar, sifted
6 oz. shredded coconut*


Preheat the oven to 350 degrees F.


Lightly oil your cake pans. I used a 8" pans. Cut a piece of parchment paper to fit the bottom of the pan. Lay that in over the oil and then oil the parchment paper. Flour the pan lightly with cake flour and set aside.


Combine the flour, baking powder, and salt into a mixing bowl and whisk to combine.


Combine the coconut milk and coconut cream in small bowl and set aside.


Cream the butter using the paddle attachment on your stand mixer on medium speed until it is fluffy. Decrease the speed on the mixer to low and slowly add the sugar over about 1 to 2 minutes. Scrape down the sides and continue mixing the butter sugar combination on medium until it is light and fluffy (about 2-3 minutes). Stir in the extract.


Turn the mixer on low and add the flour and milk mixtures alternately in three batches to the butter and sugar. Begin by adding the flour and end with the milk. Mix until just combined, don't over mix.


In a separate bowl, whisk the egg whites until they form stiff peaks. Fold the egg whites into the batter, just until combined. 


Pour the mixture into the prepared cake pans so they are basically equal. You can drop (gently and from just a few inches) the pans onto the counter to remove any air and distribute the batter evenly.


Place into the oven on the middle rack and bake for 30 minutes of until the cake is golden in color and a toothpick inserted into the center of the cake comes out clean. Cool in the pan for 10 minutes and then remove and transfer the cakes to a cooling rack.


When cool, cut each cake into 2 layers, forming a total of 4 layers. With the cakes cut side up, brush  coconut water onto the cakes using a pastry brush.


To make the frosting, add the cream cheese, butter, vanilla and almond extract to a mixing bowl. Using the paddle attachment of your mixer, mix on low until the ingredients are combined. Add the powdered sugar (sifted) in small batches so that large clumps don't appear. Don't worry if a few do, though, just use some shredded coconut to cover when assembling.


To assemble the cake, place the first layer on your plate or cake platter. Add frosting to the first layer and, using an offset spatula, spread until it is an even layer and is to the outside edges. Top the icing with shredded coconut. Continue to add the layers until you have assembled all four cake layers. Once all the layers of the cake have been added, frost the ouside of your cake and dress with more shredded coconut. Cool in the fridge prior to serving.


*For instructions on how to make the coconut cream, coconut milk, coconut water, coconut extract and shredded coconut, refer to my post on coconut cake prep.