Shrimp & Pineapple Skewers with Rum Butter Dipping Sauce

Happy Memorial Day!

Back in 2007, we were grilling out at a park during spring break. Coincidentally, we were grilling the same meal back then. But it's so yummy that we've kept it in our recipe collection and fall back on it on occasion. It's a slight adaptation from this recipe. The grilled, prosciutto wrapped shrimp are fantastic with the marinated pineapple. And oh, the rum butter sauce. Rum and butter? In a sauce? 'Nuff said.

Ingredients:
2 tbsp lime juice
2 tbsp olive oil
2 tsp minced gingerroot, plus 1 tsp
2 tsp minced garlic (about 3 cloves)
1 tsp red pepper flakes
24 medium uncooked shrimp, shelled and deveined
1/3 lb prosciutto
1 small pineapple, cut into 1" cubes
2 tbsp shallots, minced
1/3 c. dark rum
6 tbsp unsalted butter, cut into pieces and kept cold
1/8 tsp salt
1/8 tsp cayenne
handful of fresh cilantro, chopped


Soak skewers (if wood/bamboo) to prevent burning while on the grill. To make the marinade, place the lime juice, olive oil, 2 tsp of gingerroot, garlic and red pepper flakes into a bowl to combine. I mix the oil and lime juice first to make sure it is combined before tossing in the other ingredients.


Toss the shrimp and pineapple in the marinade and marinate while the grill is heating up, about 15 minutes.


I like to prepare the rum butter sauce before placing the skewers on the grill just so that I don't have to run between the two.Heat a pan to medium or medium-low heat and pour in the rum. Add the shallots and remaining teaspoon of gingerroot. Stir to combine and let simmer until the alcohol has burned off. Add one tablespoon of butter at a time, making sure to stir to combine so that the mixture doesn't break. Remove it from heat once all the butter is incorporated. It should make a pretty thick sauce.


Wrap the shrimp in thinly sliced prosciutto. Then place the shrimp and pineapple on skewers. Grill about 4 minutes per side, or until shrimp is pink and cooked through.


Remove them from the grill. Remove from the skewers and place onto a plate or platter. Sprinkle with the chopped cilantro and serve with the rum butter sauce for dipping.


We served this with brown rice and grilled corn on the cob.

Hope you all have a good (and tasty) Memorial Day with your families. Thanks to all those members of the armed forces who have and continue to serve our country.

Quick Fixin: Teriyaki Salmon with Easy Brown Rice

We've been pretty busy lately. I started working full time just as my licensing exam was over and our wedding planning kicked into high gear. So, quick and easy meals have been my saving grace. This recipe in particular takes almost no effort.


Ingredients (for fish):
1 fillet salmon
Teryaki sauce - I recommend Soy Vay teriyaki if you aren't making your own

Place the fish and teryaki sauce in a plastic zip top bag. Marinate for 15 minutes, no longer than one half hour. Place skin side down on a hot grill until the meat of the fish is cooked and it peels easily from the skin.

Ingredients (for rice):
1 1/2 c short grain brown rice
2 1/2 c water
1 tbsp butter, unsalted
1 tsp salt

Place the butter, water, and salt in a 9" x 9" glass baking dish and heat in the microwave for 5 minutes. Once heated, stir in the rice and cover with aluminum foil. Place in a 375F degree oven for 1 hour. Remove the rice after one hour and fluff with a fork before serving. This is an easy way to cook rice, with no burning the bottom, that I learned by watching, who else, Alton Brown.


We typically serve this with a salad or some other vegetable. Because corn was on sale this week and looked better than I've ever seen Florida corn, we had a few grilled cobs.


What are your favorite quick fix meals?

Avocado Kiwi Salsa

My boss came in to work the other day and had me taste her homemade salsa. It was a nice, refreshing combination of kiwi and avocado. Of course, then I asked for the recipe, thinking how nicely it would go with the fillet of snapper I had in the freezer.


Ingredients:
4 kiwi, diced
2 avocado, diced
2-3 tbsp cilantro, diced
3 tbsp lime juice, diced
2 jalapeno peppers, diced
1/2 orange or red bell pepper, diced
1/4 c red onion, diced


Mix everything together in a bowl to combine. I would recommend if you don't like heat to remove the seeds from the jalapeno.


We grilled the snapper fillet (seasoned with salt, pepper and olive oil) and served with a heaping side of the salsa. It went great with the fish and the leftover salsa went perfectly with some tortilla chips.

Beet Green & Goat Cheese Ravioli

Did I tell you? I got a pasta machine! Yes, after the hassle of making thin sheets of pasta with a water glass, I invested in a pasta machine. And this thing is wonderful. I love it. In one day I turned out 100 various ravioli to stash in the freezer for those "I'm too tired to cook" nights and even made a little bit of fresh spaghetti. So far, we've pulled the beet green & goat cheese from the freezer and made them as a side with our beef tenderloin roast. I love steak and goat cheese so this was a perfect combination.


This recipe is based on the recipe for the Goat Cheese Ravioli I had made before, but instead of spinach, we used the greens from our first beet harvest for the greens. It took a bit longer to steam the beet greens, and they needed to be torn apart because they were a bit large, but this basically is the same recipe. I love the fun pink color that it gives to the filling. Festive!


The other big change from the first ravioli recipe was the pasta dough. Remember I had mentioned the recipe from The Silver Spoon? Well, it uses a ton less egg (yay! even cheaper!) and took a bit more kneading, but was definitely lighter and more tender than the first recipe I used for pasta. We still had to tweak it a bit, since it was a bit dry, but I've listed the modified recipe here. Also, instead of the egg wash, I just would spray the pasta sheet with a water spritzer if they got a bit dry while filling. It seemed to work a lot better than the egg wash and kept the edges sealed well without making the edges tough at all in texture.

Ingredients (for pasta dough):
1 3/4 c all purpose flour (the Silver Spoon recommends type 00, but I have yet to find it)
2 eggs
salt
3 tbsp water

Fill a bowl with the flour and salt, or alternatively, place the flour and salt in a mound on your slipmat or non-stick surface. Crack the eggs into a separate bowl and mix lightly. Make a well in the flour and fill with the eggs and water. With your fingers, whisk the eggs and being pulling the flour into the eggs. Mix the flour into the eggs until it begins to get stiff, then being to knead. Some of the flour may not be mixed in, that's okay. Also, add more flour if the mixture is too wet or more water if it is too dry.

Once it is a uniform, smooth mixture and seems well incorporated (about 10 minutes of kneading), rest the ball under a damp cloth. To make the ravioli, I divided the ball (it looks so small, it's deceiving) into 4 parts and rolled one at a time to make sure the dough didn't dry out before I could fill and seal the ravioli. I also ran it through the pasta machine a few times on the thickest setting, folding it over on itself afterward and repeating to finish the kneading and to prep the dough before rolling into the thin sheets.


Make sure to make your filling ahead of time (before the dough), so you aren't scrambling around while the dough is getting dry. I also found this, like the previous ravioli, to scoop better into the ravioli when it was a bit cold. So, toss the cheese and beet green mixture into the fridge while making the dough to get it a bit firmer in texture. Once the dough is rolled thin, place the filling 1" apart on the pasta sheet. Cover with a sheet of the same size. Pinch the air pockets and seal between and on the edges surrounding the filling.


Cut the raviolis apart and place on parchment paper or another non-stick surface. Freeze for later use, or heat in salted boiling water until tender, about 5 minutes.

I'll be posting the other ravioli recipes as we thaw them from the freezer and make them. Look forward to:
  • Sweet Potato Ravioli (a whole wheat pasta!)
  • Mushroom Ravioli
  • Sausage Ravioli
  • Chicken ravioli
and whatever else I can think up in the meantime!

I Love Sundays

Because guess what I was treated to today?


Eggs Benedict! Made by my fabulous fiance and topped with homegrown tomatoes.

Creamy Mushroom Noodles

I got this recipe a few years ago from Whole Foods Meals for 4 for $15.00. The original recipe included chicken, but after making it several times, I prefer a meatless version.


Ingredients:
1/4 c  butter
1/4 c flour
1 c. sour cream (Toffuti dairy-free sour cream substitute was used in this recipe)
1 c. chicken stock
1 1/2 c mushrooms, cleaned and sliced
1 1/2 tsp paprika
8 oz egg noodles

Melt the butter in a large pan, mix in the sour cream, chicken stock, mushrooms, paprika and flour. Stir or whisk to avoid lumps from the flour. I add a little at a time so I can mix it thoroughly and to avoid lumps. You may not use all of the flour, so stop adding when you have the creaminess and thickness to the sauce that you like.

In a separate pot, cook the egg noodles in salted boiling water until tender. Once cooked, drain and toss in the mushroom cream sauce in the sauce pan.


I typically add more mushrooms since I have omitted the meat from this dish. It's a quick and easy dinner or side dish. Enjoy!

Grilled Chicken Pita Sandwich with Basil Spread

This was a leftover meal - you know, a meal made from all the extra bits lying around the fridge and freezer. We had some bean & basil spread leftover, and a half a roasted red pepper from our artichoke dip, so we pulled some pita that Nick had made a while back from the freezer and grabbed a chicken breast from there, too. It all came together in this Grilled Chicken Pita Sandwich with Basil Spread. It was a pretty tasty meal and I was happy to use up some of the odds and ends. 


We simply grilled the chicken and reheated the pitas in our toaster oven. Spread some of the bean spread and shove a slice or two of red pepper in the top. We served alongside some extra bean spread.

a taste of what's to come

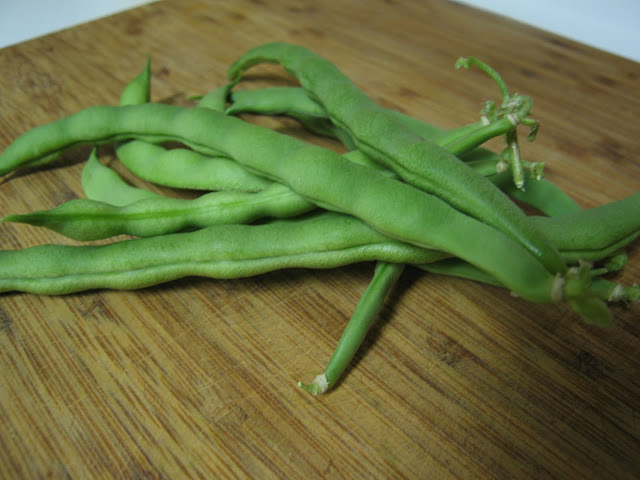
Our garden is doing well. The herbs are huge, and we're starting to get ripe, red (and purple) tomatoes. Our green bean surprised us with a handful of big, tender beans the other day, so we made a mini side dish of green beans so we could enjoy them while at there peak.


I simply cut them into uniform lengths and sauteed them with some olive oil, salt and pepper. Towards the end of the cooking, I threw in a little fresh thyme as well.

They were fantastic. Better than any green beans that I've had prior. I can't wait for our other veggies to start producing. 

How are your gardens doing? 

Pork Tenderloin with Lime, Chiles & Cilantro

Nick found this recipe on Food Network a while back and it does make a super tasty and moist tenderloin. You do have to start the marinating process either the morning of or night before you intend to make it, so it does take a little forethought. But it's worth the wait.


Ingredients:
1 whole pork tenderloin
1 lime, zested 
1/2 c lime juice
1/4 c. honey
1 1/2 tsp salt
1/2 tsp garlic powder
1 chipolte pepper in adobo sauce
1 tsp vegetable oil 
1 tbsp cilantro leaves, chopped


To make the marinade, combine the lime zest, lime juice, honey, salt, garlic powder, chipolte pepper, and oil in a bowl or container, stir or shake to combine. Place the tenderloin in a ziploc bag and pour half the marinade into the bag. Seal and move around so that the marinade touches all of the pork. Let rest overnight if possible, or for at least 6 hours. Keep the remaining marinade in a container in the fridge.


When it's time to make dinner, pull out the pork tenderloin and turn up the grill. Once the meat has come to room temperature, place it on the grill. Cooking time is about 15 minutes, turning/ rotating the meat every two minutes. A bit high maintenance, but well worth it! Use a meat thermometer if possible to avoid overcooking. Once it's reached 140 degrees internally, remove from the grill. It should have a nice char on the outside. 


Place the cooked pork onto a sheet of aluminum foil. Fold up the sides of the foil and pour in the other half of the marinade. Fold the aluminum shut, making a little pouch. This keeps the liquid inside to get absorbed by the resting pork. Let it rest for about 10 minutes. 


Once it's done resting, cut into rounds, garnish with cilantro and serve. 


Spicy Sweet Potato Fries with Cool Avocado Dipping Sauce

Mmm...Sweet Potatoes. I didn't like, or didn't think I liked, sweet potatoes for years. They always were topped with marshmallows and butter and brown sugar and the like and I just couldn't get into it. Were they side dishes or dessert? However, I love this side dish. Nick found this on Food Network and since then, I can't stop eating them. It's a great way to eat sweet potatoes without the usual other sweet toppings that are usually associated with them. It's a spicy, savory version of the veggie (with their natural sweetness of course) with a cool and creamy avocado dipping sauce. And ya'll know that I love avocados.

We served these with a pork tenderloin with lime, chili and cilantro that I'll post tomorrow.


Ingredients (for fries):
2 sweet potatoes, peeled
2 tbsp olive oil
1 tsp paprika
1/2 tsp chili powder
1/2 tsp ground coriander
salt and pepper to taste


Peel the sweet potatoes and cut it into fries. Ours are usually around a 1/2" square, and anywhere from 3-4" depending on the size of the potato. Make sure that they are all about the same size so that they cook evenly.


Once you have them cut, place the potatoes into a plastic ziploc bag (or a bowl) and add the olive oil, paprika, chili powder and ground coriander. Shake (or mix) until all the fries are evenly coated with the spices. Using a ziploc is also great if you are making these in advance, or want to save 1/2 for another time. If you are doing that, just place in the sealed bag in the fridge and they will keep for a day or two (any longer I can't say, since they never last that long in our house).


Since we were making these as a side (for two), we placed half on a piece of foil, spread out evenly, and kept the rest for another day in the ziploc. Once they are on the foil, salt and pepper them to taste.


Cook in a 450 F oven for about 15 minutes on the bottom rack. Your cooking times may vary, but just cook until they are soft. Then, place on the top rack for 8-10 minutes, until crispy. Ours got a bit charred, but I kind of like the crusty bits because they have a nice, smoky flavor.

Ingredients (for dip):
1 avocado
1/3 c cream cheese
1/3 c mayonnaise
1 jalapeno (I subbed a 1/2 poblano just because we had one)
2 scallions, white and light green parts only
1 lime, juiced
salt and pepper

Blend the avocado, cream cheese, mayonnaise, jalapeno, scallions and lime juice in a food processor or blender and process until smooth. Season with salt and pepper to taste.


This is so delicious. I actually bought more sweet potatoes this week just so I can eat this again. Yum!

Artichoke & Goat Cheese Dip

Nick was in the mood for some pumpernickel, so he made us a few loaves. To accompany the bread, we made this fantastic artichoke dip. It's a pretty flavorful and hearty dip that went well with the pumpernickel and also went nicely with some crackers when we ran out of bread. The original recipe can be found here on Food Network. We cut the recipe in half, which ended up being *almost* the perfect amount for one loaf.


Ingredients:
1/2 can artichoke hearts, about 3 should work, drained and cut into large pieces
1/2 lb chevre (plain)
1 tbsp olive oil
1 tsp lemon juice
1/2 tsp lemon zest
1/2 tsp garlic, minced
1/2 bell pepper, roasted and sliced or cut into large chunks
1 tbsp parsley, chopped
1 tbsp chives, chopped
1/2 tbsp basil, chopped
1/4 tsp salt
1/4 tsp pepper
1/8 tsp red pepper flakes

After giving everything a quick chop, throw everything into the food processor or blender. Mix until everything has combined and it a smooth consistency.